


Infinite Crisis has shut down.
With its departure, Dawnbase will be going into permanent read-only mode and will remain as both an archive of information about Infinite Crisis, and a reminder of the times we all had with the game.
Hats off to you all. It was a pleasure, ladies and gentlemen.
Sacrilege
@SacrilegeGG

Be OP! Z's Guide to Coast City Objectives
A General guide by ZagnetteLast updated: Nov 19th, 2013
Link to guide: www.dawnbase.com/guides/be-op-zs-guide-to-coast-city-objectives


17,610 8
1
Welcome, reader! I've played hundreds of Coast City matches and I'd like to impart some of my knowledge about its layout, its objectives and how to prioritize them. Since the November Update to Infinite Crisis, there have been some crucial changes that have made our in-game objectives more dynamic. I will explain the general idea of each objective and why it's great to get it, and then I will delve into some hypothetical situations you may find yourself in when trying to decide which path to take.
Each objectives varies in strength depending on the situation, mostly relying on the current position of your teammates and whether or not you have vision of the area you're attempting to control.
Also -- the timeline, located at the top of the map below the champions on each team, is essential for being aware of objectives. Timing when something respawns isn't an issue with the objective tracker at the top of the screen since the colored diamonds depict when new objectives are available. If you're unsure which color means what, you can mouse over the diamond and it will pop up a short description of the event.
Green Diamonds = First time spawns or availability for objectives
Yellow Diamonds = Power Relays unlocking
Red Diamonds = Doomsday Device Online
For a great and interactive map of Coast City, go here!
As it is, there are 3 main objectives that you and your team should be aware of:
1. Power Relays
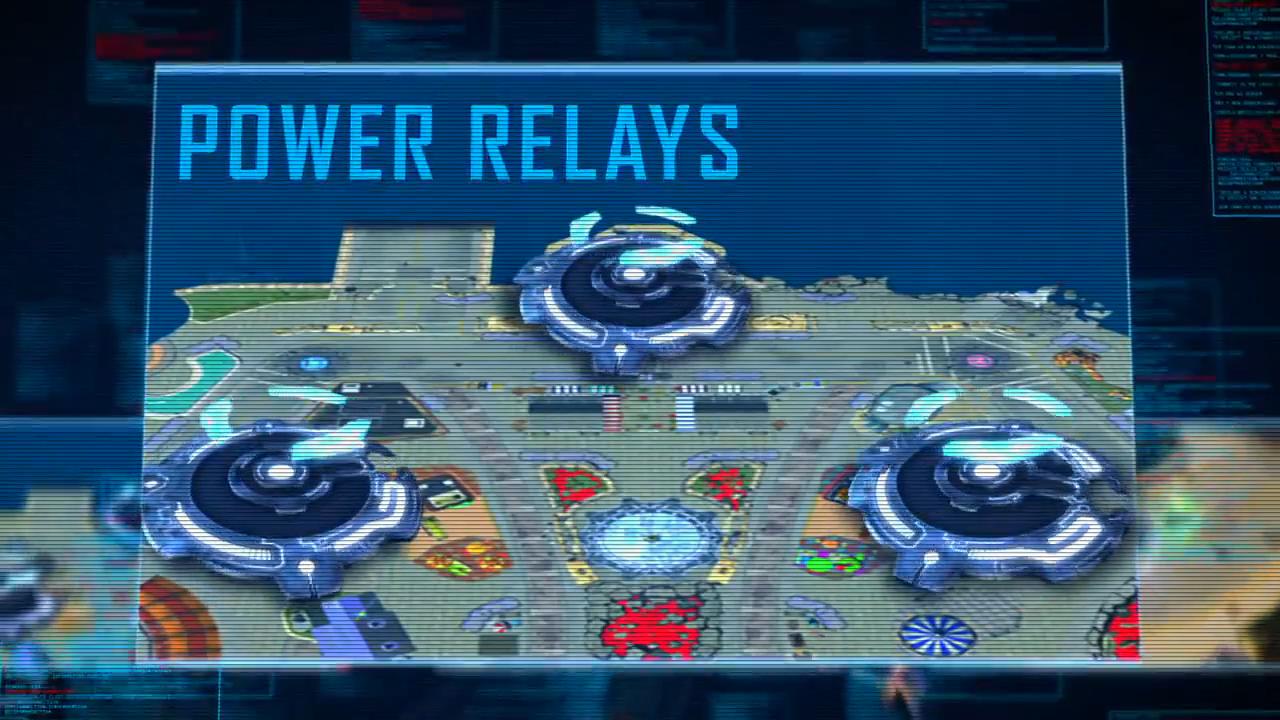
Where/what they are:
One located at the top, and one located in the jungle on either side of the middle. They are denoted by circles on the mini-mip that form a sort of triangle. Capturing one relay gives your team 10% increased damage to drones, allowing you to push the lane a bit harder. Capturing 2, on top of the 10% damage increase, adds Elite Drones to your top lane. [The third relay does not spawn until 15 minutes into the match.] Capturing all 3 relays adds Elite Drones to your bottom lane. Also, each captured relay spawns a friendly stealth surveillance drone that patrols the nearby area and clears enemy surveillance devices.
How to capture them:
By standing within the relay, over time your team color will start to fill the circle. Standing on it until the relay becomes entirely your color will lock the relay for 3 minutes, preventing enemies from capturing it. If you take damage while standing on the relay, your capture will be interrupted. This is WICKED IMPORTANT DOOD BRAH. The mini map indicates when a relay is being captured, and it flashes with the color, so you can make plays based on that information.
Why you want them:
Though having stronger drones may not seem a substantial advantage, the benefits of having Elites Drones in a lane are huge. They are difficult to clear and will push a lane really hard, so your enemies will feel pressured to defend against them. If they don't, unlike regular drones, Elite Drones can overtake a lane without assistance. This allows your team to focus on other objectives and feel safe in one or both lanes, dependant on whether or not you have 2 or 3 power relays.
2. Doomsday Device
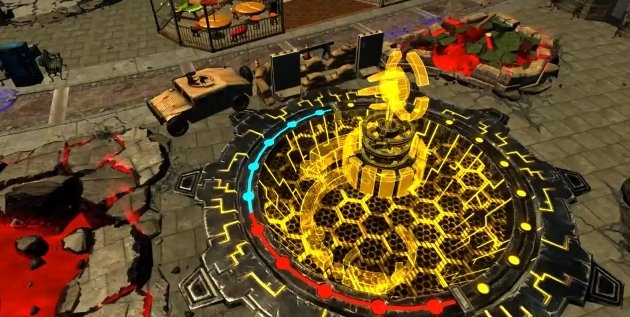
Where/what it is:
Protected by a powerful mechanical Guardian, the Doomsday is located in the Center of the map. There is only one open path into the Doomsday Device, but there are vehicles towerds the lower part of the middle that can be destoryed with Consume/Detonate/Super Strength to open a path on either side.
How to take it:
The DDD Guardian turret is the strongest CPU in Coast City. Do not attempt it early on with low numbers. It requires a whole group and someone who can tank its shots. It will fire on you as you approach it, and it will hit whomever is closest to it. After destroying the guardian, a beacon will drop. Whomever right clicks it bends down to grab it, which takes about a second. This can be interrupted. Once you grab it there are 3 red gems floating around you that everyone can see. To fire it, aim it where you want it to be deployed and press T. It takes a couple of seconds to fire to give enemies time to react.
Why you want it:
Taking the DDD gives you 3 main options: using it to do massive damage to players in a group, using it to deal damage to turrets and help your team take it down by mitigating some of its armor, OR to neutralize an enemy-controlled power relay. You have to capture it after it becomes neutral, but this is a viable option for losing and winning teams alike. Knowing how best to use the DDD takes experience, and no choice is a "wrong" choice. Experiment with its usage.
3. The Raider
I looked up the Raider on google image, and this is what I got.

Where/what it is:
Beneath the bottom lane, tucked away and waiting to spawn at the 7 minute mark, the Raider is a new objective to provide more incentive to be aware of bot lane as the game progresses. It grants 200 credits map-wide to each champion (meaning, you don't have to be near it to get it) for a total of 1k team gold, as well as experience. Each time it is destroyed, it will respawn in 6 minutes (this is not yet tracked on the timeline but will be included in a future update).
How to take it:
It's a straightforward fight against the CPU. Weaker than the Doomsday Device but stronger than an Elite Drone, this is not an easy fight to do alone.
Why you want it:
Global credits and experience are always good. Good things. Much good. If you can sneak the Raider or force a fight in your favor, you can establish an advantage really early on. Controlling it throughout the game contributes significantly to your team's overall credits. In late game, it's not as essential to grab when artifact builds are close to completion, but it's always a fantastic objective to bear in mind. It can also help to destroy it if the enemies are focused elsewhere and can't contest it. Free stuff! Good good.
As closing notes, I want to stress to everyone that having vision of these objectives ahead of time is SO FREAKING CRITICAL to giving yourself the advantage. Surveillance Cameras or X-Ray vision should be taken by at LEAST one person on the team. In addition to vision, controlling map paths is also great for opening up ganking paths with Super Strength or Consume, or for cutting a path through the Doomsday Device, etc.
Try to bear those two things in mind (vision and opening paths) when preparing to take an objective. Know that, though you may have those powers, so may the enemies, and they may try to employ similar tactics. Always be prepared for what the enemy will be thinking!
Thanks for reading my words all, and I hope this is a good resource for all players. See you on battlefield!
[P.S.] I made this really quickly so their may be some minor errors/typos. I will revisit it to double check and if you see something glaringly incorrect, shoot me a message! Tanx gais!
Each objectives varies in strength depending on the situation, mostly relying on the current position of your teammates and whether or not you have vision of the area you're attempting to control.
Also -- the timeline, located at the top of the map below the champions on each team, is essential for being aware of objectives. Timing when something respawns isn't an issue with the objective tracker at the top of the screen since the colored diamonds depict when new objectives are available. If you're unsure which color means what, you can mouse over the diamond and it will pop up a short description of the event.
Green Diamonds = First time spawns or availability for objectives
Yellow Diamonds = Power Relays unlocking
Red Diamonds = Doomsday Device Online
For a great and interactive map of Coast City, go here!
As it is, there are 3 main objectives that you and your team should be aware of:
1. Power Relays
Where/what they are:
One located at the top, and one located in the jungle on either side of the middle. They are denoted by circles on the mini-mip that form a sort of triangle. Capturing one relay gives your team 10% increased damage to drones, allowing you to push the lane a bit harder. Capturing 2, on top of the 10% damage increase, adds Elite Drones to your top lane. [The third relay does not spawn until 15 minutes into the match.] Capturing all 3 relays adds Elite Drones to your bottom lane. Also, each captured relay spawns a friendly stealth surveillance drone that patrols the nearby area and clears enemy surveillance devices.
How to capture them:
By standing within the relay, over time your team color will start to fill the circle. Standing on it until the relay becomes entirely your color will lock the relay for 3 minutes, preventing enemies from capturing it. If you take damage while standing on the relay, your capture will be interrupted. This is WICKED IMPORTANT DOOD BRAH. The mini map indicates when a relay is being captured, and it flashes with the color, so you can make plays based on that information.
Why you want them:
Though having stronger drones may not seem a substantial advantage, the benefits of having Elites Drones in a lane are huge. They are difficult to clear and will push a lane really hard, so your enemies will feel pressured to defend against them. If they don't, unlike regular drones, Elite Drones can overtake a lane without assistance. This allows your team to focus on other objectives and feel safe in one or both lanes, dependant on whether or not you have 2 or 3 power relays.
2. Doomsday Device
Where/what it is:
Protected by a powerful mechanical Guardian, the Doomsday is located in the Center of the map. There is only one open path into the Doomsday Device, but there are vehicles towerds the lower part of the middle that can be destoryed with Consume/Detonate/Super Strength to open a path on either side.
How to take it:
The DDD Guardian turret is the strongest CPU in Coast City. Do not attempt it early on with low numbers. It requires a whole group and someone who can tank its shots. It will fire on you as you approach it, and it will hit whomever is closest to it. After destroying the guardian, a beacon will drop. Whomever right clicks it bends down to grab it, which takes about a second. This can be interrupted. Once you grab it there are 3 red gems floating around you that everyone can see. To fire it, aim it where you want it to be deployed and press T. It takes a couple of seconds to fire to give enemies time to react.
Why you want it:
Taking the DDD gives you 3 main options: using it to do massive damage to players in a group, using it to deal damage to turrets and help your team take it down by mitigating some of its armor, OR to neutralize an enemy-controlled power relay. You have to capture it after it becomes neutral, but this is a viable option for losing and winning teams alike. Knowing how best to use the DDD takes experience, and no choice is a "wrong" choice. Experiment with its usage.
3. The Raider
I looked up the Raider on google image, and this is what I got.
Where/what it is:
Beneath the bottom lane, tucked away and waiting to spawn at the 7 minute mark, the Raider is a new objective to provide more incentive to be aware of bot lane as the game progresses. It grants 200 credits map-wide to each champion (meaning, you don't have to be near it to get it) for a total of 1k team gold, as well as experience. Each time it is destroyed, it will respawn in 6 minutes (this is not yet tracked on the timeline but will be included in a future update).
How to take it:
It's a straightforward fight against the CPU. Weaker than the Doomsday Device but stronger than an Elite Drone, this is not an easy fight to do alone.
Why you want it:
Global credits and experience are always good. Good things. Much good. If you can sneak the Raider or force a fight in your favor, you can establish an advantage really early on. Controlling it throughout the game contributes significantly to your team's overall credits. In late game, it's not as essential to grab when artifact builds are close to completion, but it's always a fantastic objective to bear in mind. It can also help to destroy it if the enemies are focused elsewhere and can't contest it. Free stuff! Good good.
As closing notes, I want to stress to everyone that having vision of these objectives ahead of time is SO FREAKING CRITICAL to giving yourself the advantage. Surveillance Cameras or X-Ray vision should be taken by at LEAST one person on the team. In addition to vision, controlling map paths is also great for opening up ganking paths with Super Strength or Consume, or for cutting a path through the Doomsday Device, etc.
Try to bear those two things in mind (vision and opening paths) when preparing to take an objective. Know that, though you may have those powers, so may the enemies, and they may try to employ similar tactics. Always be prepared for what the enemy will be thinking!
Thanks for reading my words all, and I hope this is a good resource for all players. See you on battlefield!
[P.S.] I made this really quickly so their may be some minor errors/typos. I will revisit it to double check and if you see something glaringly incorrect, shoot me a message! Tanx gais!
Latest comments

Solid. Thanks for taking the time to educate.
 Solid. Thanks for taking the time to educate.
11:44 am, Dec 17th, 2013
Very well written and detailed. This i like.
3:58 pm, Nov 18th, 2013
Beautiful guide (nice one for the raider)
11:37 am, Nov 18th, 2013
Wait, you said that the yellow diamond tells you when raider respawns? I've never seen an indicator for that. My team has always had to time when the raider respawns
7:40 pm, Nov 16th, 2013

This is true. There is currently no indicator for a raider respawn, we've always had to put 21:16 or something into chat if we're tracking it.
2:21 am, Nov 17th, 2013

You speak the truth! I've updated it accordingly, thanks :D
10:50 am, Nov 18th, 2013
This is a very comprehensive guide. Thanks
6:52 am, Nov 16th, 2013
Fantastic, I think you should include that the raider takes 6 minutes to respawn :3
5:17 pm, Nov 14th, 2013
Why thank you, sir!
10:39 am, Nov 14th, 2013
Really no one has commented? Thanks Zagnette for this contribution! Well written and detailed. This will help many new players. :)
11:38 pm, Nov 13th, 2013
HOW DO I USE DA REPLY BUTTON? BRAIN GO DO
10:39 am, Nov 14th, 2013


 where the FUCK is the 'guide'?