• BreezeBlue Network
  • Dawnbase×
  • Home
  • Champions
  • Items
  • Stolen Powers
  • Browse Guides
  • Help & FAQ
  • Premium Upgrade
  • Infinite Crisis has shut down.

    With its departure, Dawnbase will be going into permanent read-only mode and will remain as both an archive of information about Infinite Crisis, and a reminder of the times we all had with the game.

    Hats off to you all. It was a pleasure, ladies and gentlemen.

    Sacrilege
    @SacrilegeGG

    Infinite Crisis builds for Poison Ivy

    Force of Will

    A Poison Ivy guide by chronolinq
    Last updated: May 26th, 2015
    Link to guide: www.dawnbase.com/guides/1958-Poison-Ivy-Force-of-Will
    7,026 2
    Score:

    39

    Ability levelling order
    01 02 03 04 05 06 07 08 09 10 11 12 13 14 15 16 17 18 19
    Starting Items
    Mid Game Core
    Full Core
    Defensive Options
    Offensive Options
    Augments
    Modifiers
    Stolen Powers

    Introduction

    Hi all :) I'm chronolinq (CH4_chronolinq in-game) and I'm a support main. Poison Ivy is my main champion/comfort pick and while not the strongest champion, she has a highly versatile skill set that makes her fun to build and play. While you can play her in a number of different roles from full support to solo lane blaster to attack damage carry, I believe that she (and most other Controllers) are best played in a full support role.

    This build will reflect a full support role, but within that role, she does have flexibility in how she ranks her skills. I will touch on that as I explain her skill set. Shout outs to Voltzoen and Sick.Kuma for their input and advice! Check out my buddy Volt's Poison Ivy guide here.


    Skills


    Root Strike (Q)
    This is your most important skill to master and landing the knock up consistently will make or break you as a 
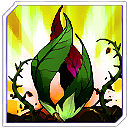
Poison Ivy player. This skill will also be ranked first to lower the cooldown on the skill, raise the knock up time, and give it some respectable base damage. While landing the knock up is quite important, it can be hard to land in lane as the opponent generally has a wide area to move laterally and while farming, champions tend to stay at safe distances. This skill is a skill shot, meaning that rather than hitting a target unit, it will hit the point where your mouse cursor is or travel its full distance before exploding. You can press the skill again to cause the Root Strike to explode early so as a best practice, you should always fire this skill to its full range and detonate it when the Root Strike crosses paths with a target.

    This is your main harass tool in lane as well as your skill to lock down high priority targets that are damaging your team. When fighting, always lock down the highest priority target (generally high DPS champs like Marksmen) or champs that are closing in on low health allies. During a fight, the skill can be considerably easier to land as you are generally closer to the target and the target is generally doing something (attacking or using a skill) that prevents them from freely moving. When disengaging from enemies, lead the opponent for a couple steps to find their path (usually directly after you) before launching a Root Strike to knock them up.


    Blow Kiss (W)
    This skill is a great tool against auto-attacking champions and one of the reasons why she is considered the bane of Attack Damage champions. When this skill lands it deals damage and blinds the enemy for a period of time. While blinded, that champion deals 80% less damage on auto attacks. I generally rank this third, but if you are aiming for a more aggressive build against an AD champion, ranking this second is a good option. At early ranks, it will mitigate about 1 basic attack, but at later levels it can reduce damage from several basic attacks which is critical given how much damage a Marksman's critical hit does.

    While this skill appears great for trading, note that the skill range is less than Root Strike and your Basic Attack, meaning you must be firmly engaged for the skill to land. If the opponent has already landed their Basic Attack and retreated, you will only land skill damage and perhaps a Basic Attack. Success in using this skill relies on predicting when the opponent will try and Basic Attack you. While in lane, if the opponent's AD champ is advancing toward you, but still farming, you land this skill against them while they're Basic Attacking a drone to initiate a trade. If they continue to attack you, you can Basic Attack them once or twice. Once the blind is gone, you can apply a Thorn Shield to continue attacking. During a team fight, this skill should be used on a Basic Attacking champion dealing the most damage. This is generally a Marksman, but can also be a Bruiser or Assassin. Blow Kiss can also be used as an execute on a fleeing champion as once the target is chosen and the skill is fired, the kiss will follow them until contact.


    Thorn Shield (E)
    This is a pretty standard shield skill. The nice thing about this is that enemies that basic attack you will lose 20% move speed for a duration of time. Since ranking this skill does not increase the slow amount or reduce cooldown, I generally rank this last. The base shield amount grows by a healthy increase for each rank, but the skill's main chunk of shield usually comes from Will scaling. I would only put this higher on my rank list if my lane partner is diving for kills often and a strong shield can allow them to secure the kill.

    While in lane, if you are going in to poke and enemy champion, apply the shield on yourself when you're about in basic attack range of the enemy. Once there, you can attack them once or twice and win the trade because of your added HP. Otherwise, save the shield for when it needs to be used which is generally when your lane becomes the target of a gank, and during team fights. In team fights, use Thorn Shield early and often to mitigate as much damage as possible. Target allies that are the focus of the enemy team for maximum effect. Another thing to note is that you can shield any ally, so shielding a drone that is taking turret damage can help you secure more damage on towers.


    Deadly Flora (R)
    Poison Ivy's ultimate skill is quite a good one. However, unlike others, it generally does not have an immediate effect. Especially early on, enemy champs might just walk through it to kill you. Later on in the game, the slow from your Will scaling becomes too much to walk through without taking a large amount of damage. I rank this skill when available to boost its damage and prevent champions from walking through it unpunished.

    This has fantastic uses. It can help secure a gank/kill with its tremendous slow, initiate a team fight, or facilitate a disengage. When using it to secure kills, place the ult in front of where you think the enemy will move into. While in lane, this is generally toward their tower. When using this to engage a team fight, I like to wait until the opponent has made the first move and begins to focus an ally. If Poison Ivy is left to start the fight by laying down Deadly Flora, there's a chance she may get focused and die before the fight begins. By waiting until the enemy engages, you are preventing them from disengaging immediately and turns the trade into your favor. Finally, with it's fantastic AoE slow and respectable damage over time, you and use it to prevent enemies from chasing you. If they continue, you can even line up a Root Strike to stop their movement and keep them inside the skill area to tack on more damage.


    Healthy Glow (Tab)
    This skill is a unique take on heals in that it's an AoE heal over time. So this can potentially heal your entire team. Instead of using the skill at will, this skill is triggered after using 4 skills. Keep track of how many skills you have used (there's a count on the skill) and you can use that knowledge to start a fight under pretense that you are at a disadvantage. I like to rank this second to help boost the heal per second as high as possible to help with lane sustain. While the skill ranks quite nicely will Bonus Will, any extra heal is beneficial especially since the heal is over time, and standing in a known area is not good information to give your opponents.

    Something to note also is that the heal area appears centered on the location of your last skill use. If your last skill use is Root Strike, Healthy Glow will proc when the skill explodes, not when it is launched. Keep this in mind when you're planning on healing to try and drop it in a safe and/or accessible place. Dropping a heal in a dangerous location could be a bad signal to a teammate. The heal applies to any allied unit so when pushing towers, dropping a Healthy Glow near a tower where your drones are will increase their survivability.


    Stolen Powers


    Blue Beetle's X-Ray Vision
    When playing with a coordinated team, X-Ray vision is a tremendously useful skill. It's primary use is to clear cameras, but you can do a bit more with it. It grants a wide area of vision around your champion for 8 seconds and is the safest way to check stealth pads around you for enemies without having to risk placing a ward. Another use for it is to enable sight through stealth pads when an ally is trying to secure a kill. When rounding a corner, or going into a stealth pad blind, it allows your team to land Basic Attacks, skill shots, and most importantly, realize if the enemy champion is trying to bait you or not. You may be tempted to take 
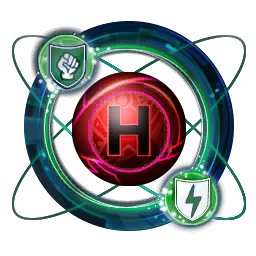
Atomic Poison Ivy's X-Ray Vision because of the lower Cooldown, but if you clear a cam, the difference is only 10s, so I value the 30 credits more early game.


    Robin's Surveillance Camera
    Above all else, vision is the most important asset you can have in this game. With knowledge of where your enemies are and where they are headed, you can better develop counter strategies. Robin's Surveillance Camera are a good choice because they contain 5 charges instead of the standard 3. This means that assuming your are sustaining well enough in lane, you won't need to back to base too often. Currently the only way to restore Camera charges is to return to base.

    Other Choices


    Arcane Green Lantern's Healing Wave
    In the spirit of keeping your team alive, this is the premiere Heal to take to help keep allies and yourself alive. For 5 seconds, all the allies that were within the heal range receive additional Attack Armor and Power Armor. This heal is best used early in a fight to take advantage of the extra armor. Be careful of the enemy disengaging after you use it. Enemies will sometimes engage just in an effort to make you use your stolen power to set up a better engage for them in near future.


    Krypto's Healing Wave
    This is the newest Heal and potentially a good one. Out of all the heals, this is the one that heals you and allies for the most. Take this heal if you anticipate having trouble sustaining in lane. This is not quite as good for engages/fights because the extra heal is heal over time where as 
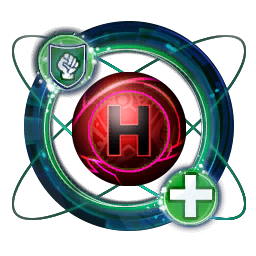
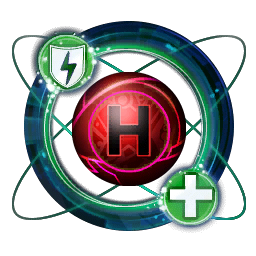
Arcane Green Lantern's Healing Wave provides you with armor instantly for 5 seconds.


    Amplifier Set

    Modifiers


    Empowered Amulet of Isis

    Enhanced Will Gorilla Grodd's Helmet

    Empowered Eye of Ekron

    Mercury's Gift 2 is an amazing tool with so many uses. Getting it is a must on anyone that builds Amulet Of Isis (3) as a core item. Gorilla Grodd's Helmet (4) with +200 Will is also a nice boost for a relatively cheap price. Finally, getting a bonus 4% of Bonus Will as Power Damage is a nice boost and gives you more from your core build.

    Augments


    Fortress

    Phalanx

    Oak

    Vanguard

    The idea behind these augments is to give you a sizeable increase to your armor (especially early) to help mitigate damage and increase your lane sustain. While the armor, prevents some damage, your heal will help your regain health lost and allow you to make more aggressive plays and attempt to trade more often.

    You'll start the game with 4.68 Attack Armor and Power Armor and an extra 5.02 Health. By level 19, this will scale to be 18.72 Attack Armor and Power Armor and 95.38 Health.

    These Modifiers and Augments will most likely change in the near future as I fine tune my gameplay and experiment with different augments.


    Item Choices


    Modular Health Vial
    There's not much to say here, but they are quite good early. One thing to note here is that higher tiers of the vials heal you more PER charge as well as having more charges. While it makes sense to take Modular Tektite Vial (3) since you have a heal skill, I tend to be quite aggressive with my Poison Ivy play and make good use of the extra health.


    Amulet of Isis
    This is a great item for supports. Stats wise, it nets you Health, Will, a bit of Move Speed and 10% Cooldown Reduction. The keyword on it's final tier though is the reason you buy this item. With the mod, it gives you an incredible 35% speed boost in an area around you for 5s. It's excellent for securing kills, engaging, and disengaging as a team. One interesting use for it is that if you are in the middle of an engage, you can activate it for the speed boost to allow you and your allies to position better and dodge skill shots more easily.


    Gorilla Grodd's Helmet
    This is your first investment item and quite a good item for Controllers. It gives you a nice 400 Bonus Will (600 Bonus Will with the mod), but its other stats push this item over the top. +10% Cooldown reduction, +30% Resilience for you and +15% Resilience for the team, and finally, the Psychic Shield active. The Psychic Shield is an amazing active and plays a pivotal role in keeping your squishies alive. Using it at the right time can save a teammate from enemy team focus and allow your to turn the tide of a battle while your opponent's skills are on cooldown. Another important thing to note is that the shield also makes your target immune to disables.


    Qward Gambit
    This is your other investment item and one of my personal favorites. It gives you Bonus Will, a bit of Power Damage, and a bit of Power Lifeteal that gives you a bit more sustain. The Power Damage and Power Lifesteal is an aura so staying near your Power Damage allies can give them a nice boost to damage and sustain in a team fight. At the top tier, it will give you access to Protection Field which is another Shield active, but unlike Psychic Shield, it gives them to ALL teammates in the area. The shield is not quite as strong Psychic Shield, but the ability to shield multiple allies gives you an amazing team fight advantage in terms of trading damage. Try and save this shield until after major CC skills have been used by your opponent as shield time spent CCed is not as effective.


    Eye of Ekron
    While building all this Will is great, not being able to damage your opponents can become something of a problem later in the game when you're trying to close out kills. Building Eye of Ekron to its maximum tier will convert 2% (4% with the mod) of your Bonus Will into Power Damage. While not as impressive an amount as building Power Damage items, it gives you more value for building Will items.


    Steel's Breastplate
    This is generally my goto Attack Armor counter item as it stays in line with giving you Bonus Will and some Attack Armor. This is also a good item if you're drawing a lot of focus of any kind of damage. It's active Iron Will redirects 20% of ALL damage over 5 seconds to your Will which can end up saving your bacon.


    Suit of Sorrows
    Suit Of Sorrows (4) is a heavy Attack Armor item if you're taking heavy focus from Attack Damage champions, but not from Power Damage Champions. With a fully built Suit Of Sorrows (4), you should be able to take on/stall many Attack Damage champions aside from heavy crit build champions between the Attack Armor, Attack Damage Reflect, and your skill set designed to mitigate Attack Damage.


    Metallo's Heart
    This item is here primarily as a counter build item. It's not well suited for Controllers as its main use is to reduce the attack speed of opponents (generally the opponent's Marksman) and the aura range is quite small, putting you in harms way if you decide to get this item. Generally I will only build this item if the opponent is building attack speed without building damage, otherwise, it can be a risky buy. It does give a nice 10% Cooldown Reduction at its final tier though.


    Entropy Aegis
    While this item gives you some nice Health and Power Armor, its main attraction is the skill shield that it provides. Towards the late game, many champions tend to pick up this item because it prevents wombo combos from going off by blocking a skill with the shield. I will generally take this item if I feel that there are 1 or 2 engage skills that are preventing me from surviving/contributing to the encounter. Also important to note here is that Stolen Powers count as skills so if you are the target of something like Super Strength, you will not be knocked up/slowed or damaged and instead your skill shield will just break.


    Kryptonian War Armor
    This tends to be an awkward item for most champions because it has great overall stats, but it doesn't do any 1 particular thing well. However, this is my choice of item if I'm the focus of Power Damage or if I feel that during encounters, I take too much damage from poke and want to sustain better. The passive on the final tier of the item increases any kind of heal amount coming your way. This allows you to heal much more Health from Healthy Glow.


    Abin Sur's Lantern
    This is your largest single Will item and gives you a big boost to your Shield actives. At full stacks it gives you an amazing 800 Bonus Will. However, since it's not a part of your core build, it may be hard to get full stacks off on it. It does give great stats however with 400 Bonus Will, 30 Power Damage, 10% Cooldown Reduction and a Will Regen aura. One thing to note about building this item: You are generally ok with building it to tier 3 until late game, unless you need a quick/cheap +200 Will.

    Offensive Options

    While there are offensive options listed here, Poison Ivy is best used to keep her allies alive. After/while completing your core items, it is recommended that you build Defensive Options instead of Offensive items.


    Cosmic Staff
    Finally we come to Offensive Options. Because this is a Will Tank build, My choices are geared toward increasing your ability to aid your team. That being said, Cosmic Staff is a great damage item for controllers. It gives you 10% Cooldown Reductiona and it has 2 great passive keywords to lower your opponent's healing as well as do percent Health damage at its final tier so you get a boost to your damage that doesn't rely on your Power Damage scaling.


    The Starheart
    Finally, if you find that opponents are not deterred by Deadly Flora, or tend to walk through and not care, The Starheart (3) can help dissuade the opponent from just walking through Deadly Flora without consequences. With a fantastic 100% Power Damage scaling, Deadly Flora will make excellent use of the Power Damage from this item.


    Build Order

    Start
    Because of your ability to heal yourself and your lane partner in the bottom lane, I generally choose to start with Gorilla Grodd's Helmet (2) and Modular Health Vial (2). The Bonus Will will help with your defensive skills a bit and the vials will increase your sustain even more. An alternate start is to start with Modular Health Vial (3) and Gorilla Grodd's Helmet (1). This gives you a better start against a start of game invade, but as invades are getting less rewarding, I tend to not choose this option as often. Gorilla Grodd's Helmet (2) will be your first buy when you get into lane.

    Early Game
    Once I hit 500 Credits and then 750 Credits (a total of 1250 credits), I purchase up to Amulet Of Isis (2). You get a healthy boost to Health and Will with 100 apiece and a bit of Cooldown Reduction.

    Mid Game
    I spend my next 750 credits on Qward Gambit (2) usually. Why 2 investment items? Now you have a choice to make. At 15 minutes, the top relay opens and is generally the first major team fight, so you'll want to farm another 1750 Credits by 15 minutes to get either Gorilla Grodd's Helmet (4) or Qward Gambit (4). Having another huge shield for the team fight will change it's dynamic greatly. Qward Gambit (4) is best for all in engages while Gorilla Grodd's Helmet (4) is better for "protect the carry scenario". Most of the time I tend to choose Qward Gambit (4) for the team shields to better keep every one on the team alive as opposed to playing the numbers game and out trading kills. Another option here is to spend 1250 credits on the final tier of Amulet Of Isis (3) for the AoE speed boost if you imagine that the top fight will be too one sided (If it's in your favor, you can use Mercury's Gift to secure kills, or to run away if you are behind).

    After that, spend your next 1750 Credits on the other Shield item that you didn't take for the first relay fight to round out your defensive kit and then spend 1250 on Amulet Of Isis (3) for the Mercury's Gift speed boost.

    Late Game
    At this point, you have a pretty good core, and you can begin to make some informed decisions. If you are behind or under heavy fire, you can take a look at the defensive options explained above, or continue on the happy path and get Eye Of Ekron (4) before starting your defensive options. Remember that this is a general build order and if things are deviating from plan, make sure you adjust your build accordingly.


    Play Tips

    Laning Phase
    While laning, your goal is to keep your Marksman alive and able farm unharassed and help them secure kills. Harass the opponent by moving laterally to the drone wave to get in position to poke. Once you have landed your poke, immediately move back behind your drone wave so that you don't take too much aggro from enemies. You have a couple of different poke options:

  • Basic Attack - Best to use when enemies come forward to last hit. Not a good choice if they are aware of you because Poison Ivy does not have the damage to win Basic Attack trades.
  • Root Strike - The safest way to poke, but also quite hard to hit in lane. The reason for is this that if you poke from long range, the enemy has quite a while to react and move out of the way. You can use this to zone the enemy away from last hitting. Remember that if does damage even if it doesn't Knock Up. Whenever you go for a Root Strike, make sure your Marksmen is in a good position to follow up. If you land the Knock Up, that is free damage and can force the opponent out for some time.
  • Thorn Shield > Basic Attack - This is a safer way to poke with your Basic Attack, and also you to add stacks to your passive. If your target is attempting to trade Basic Attacks with you, you can use Blow Kiss to continue being on top of the trade. The blind effect greatly reduces Basic Attack Damage.
  • Blow Kiss - While this is a great skill, the downside to this skill is that the range is somewhat limited to be used as a poking tool and since you can't move while you fire it, it can be risky. If you are in position to use it against an opposing Marksman, it's a great way to throw off their last hit timing by reducing their damage for one or two auto attacks.

    Feel free to use her skills freely to be able to proc Healthy Glow more often. Be aware of when it is up as well because initiating trades with it proccing on your next skill greatly improves your odds of winning a trade. When pushing your lane out and being aggressive, try and keep Root Strike at the ready. Having great vision will help you avoid ganks, but if the enemy makes a move, use the Root Strike to save the target of the gank. If the enemy is clustered, you can knock them all up and make a clean escape.

    Team Fighting
    While most champions have skill combos or skill progressions to make best use of their skills, Poison Ivy's skills are all judgment calls. You want to stay somewhere in between your front line and back line to be most effective.

  • Use shields to protect your front line or allies that are taking focus fire.
  • Blow Kiss is best used against Bruisers or Marksmen to help reduce DPS. Be careful when trying to aim for their backline as you can immediately become the focus.
  • Use Root Strike on targets that you are focusing for maximum affect. If playing defensive, you can use it to poke and attempt to start an engage by getting a knock up. If you moving forward with an engage, I like to sometimes save Root Strike and keep and eye on my back line. Remember that the knock up is a hard CC move and can stop many powerful skills such as Blocking Bracers or Energy Conversion. It's a great counter CC tool and if you get the timing and reaction/anticipation to use it in a counter fashion often, you can really turn team fights around quickly.
  • Deadly Flora is a great tool and is usually best used to help secure kills and zone enemies out. Since you are a Will tank, the AoE slow (roughly 50%) late game is incredible and helps your team secure kills before the enemy disengages. Just be careful trying to place it as it has a very short range.

    Here are a couple videos demonstrating the use of Root Strike defensively and offensively:
    Root Strike Examples 1
    Root Strike Examples 2


    Conclusion

    I hope that you have learned something from reading this guide. I will be updating this guide as I refine my Poison Ivy play. Comment if you have questions or suggestions. If you're new and want to try the game out, click on this referral link to get started. Check me out on Twitch if you're interested in watching me play or asking questions live. Thanks for checking out my guide :)
  • Latest comments
    l Actually registered to the site just so l can leave a comment here. This is one of the best guids l've read and one of the best builds that l've tried. Sure l don't get a great many kills with it but that's just me playing safe. my assists are usually upwards of 15. with a good team even up to 25. Only thing l'd do differet is get a healing wave stolen power[l usually use ivy's one because it gives so AD and PD bonuses]. Also rush the gambit as fast as possibly it's amazing
    8:07 pm, May 4th, 2015
    Thanks for the comment! :)  Glad it's working out for you
    9:43 pm, May 4th, 2015
    needs more pink
    4:27 am, Apr 13th, 2015