1. Introduction
This is a guide on how to play
 Zatanna
 on Coast City and not be a complete background fixture. I reject the notion that Zatanna should be played as pure support and not gain any kills for her own. Among her many roles, she is primarily a nuker and with the right strategy and farm (the amassing of large amounts of money in a short time period), she can three-shot squishy champions very easily. Even without a farm advantage, Zatanna can still debilitate her opponents while wearing them down with persistent attacks.
Most of the items in this guide's item build correspond closely to Infinite Crisis' recommended item build. That is because I have never found a large enough reason to stray from this order and change the playstyle I adapted for it. If you are too lazy to memorize another guide's item build order, then this guide is for you. Read on and I'll explain to you extensively on how to play Zatanna to her fullest as a support champion who can also carry (meaning you 'carry' your team to victory with your devastating potential to kill enemies in a short amount of time) with the recommended build.
1.1 Who is Zatanna and why play her?
Zatanna Zatara is a girl who can do magic that no other Champion in Infinite Crisis can match. Absent stolen powers, she has an incredible spammable primary damage ability with her Skewer (Q), which she can cast virtually non-stop as soon as you get your [[Doctor Destiny's Dreamstone (2)]] and [[Abin Sur's Lantern (2)]]. Her Dash, Dazzle (W) is both a powerful buff and debuff that can dictate the outcome of chases and escapes, and also help you in racing across the map to capture power relays. Her Protect, Punish (E) can save allies from death, but more importantly facilitates your capacity to burst damage that enemy champions always tend to underestimate from a mere 'support' champion such as Zatanna. Finally, Be a Rabbit (R) is a powerful hex that can shut down a champion and open him up to a huge amount of damage with its power and attack armor debuff.
In short, Zatanna is all about utility, poking, and pouncing on low health champions with her devastating Punish+Skewer (E+Q) combos. Very few champions can match her early-game burst damage potential (the capacity to deal a large amount of damage in a small amount of time). This makes you an early game powerhouse, and once you get your
 Atlantean Royal Seal (4)
, the Skill Harrier combined with your low cooldown Skewer (Q) will allow you to perma-slow enemies. With sufficient skill, you can dominate the laning phase, racking up a couple of kills and allowing you to get your core items quickly to become a threat in your own right. While you should always be mindful of your support functions (placing Surveillance Cameras, capturing Power Relays), most of the time you should be focusing on killling champions, helping your teammates kill champions, or push/defend the lanes with your E+Q combo.
If you fancy an active champion, Zatanna is a great alternative to other gankers or carries, and can out-carry even Green Lantern if she snowballs with lots of Power Damage items. Her 'support' function lies mainly in her crowd control with Dash, Dazzle (W) and Be A Rabbit (R). However, she is not as helpful to her team as Poison Ivy and can't match the plant mistress' healing. If you wish to play a more pure team support champion, then Poison Ivy is a better alternative.
2. Advantages and Disadvantages
2.1 Pros
[list]
Skewer (Q) is a cheap, low-cooldown nuke that can be used to poke and harass constantly
Low cooldown Dash, Dazzle (W) means that you are the master of escapes and chases; no champion will ever escape you and you will always be able to run away from a gank
Protect, Punish (E) facilitates burst damage in combination with the E+Q combo
You can clear drone waves very fast with your E+Q combo, allowing you to farm quickly or protect towers
You can fit well with any champions in the lane as a babysitter, crowd controller, or primary nuker
As a support champion, you are not too money-dependent; you will always have utility even with poor farm
With many effective single-target abilities, you can destroy lone, out-of-position squishy champions
However, if you gain a good amount of money in the early game, you can become a full-blown carry that can rival Green Lantern and other power damage champions
[/list]
2.2 Cons
[list]
As a support champion who relies on abilities, you are somewhat level-dependent
As a support champion, you should always be performing some support functions, even if you don't like it
Playing Zatanna offensively and actively pursuing kills may detract from the farming of your team's carries and gankers
Zatanna's damage abilities scale relatively poorly in the lategame compared to other power damage-based champions: 50% for Skewer (Q) and 25% for Punish/Protect (E)
You will always be a fragile champion; melee champions eat you for breakfast if they catch you with your pants down
You lack a reliable high damage, large area AOE spell; this generally means that you are more effective fighting smaller engagements rather than big teamfights
You're going to be accused of kill stealing all the time when you are aggressively skewering low health champions
[/list]
3. Abilities
3.1 SKEWER (Q)

Zatanna summons magical swords, and after a short delay they deal 60 Power Damage to enemies in an area. If it hits a target with the Punish effect, Punish will detonate early.
Damage: 60 | 90 | 120 | 150 + 50% Power Damage
Cost: 35 | 40 | 45 | 50
Cooldown: 2.2 seconds
Skewer Strategy: Skewer has a base cooldown of 2.2 seconds. You read that right: TWO POINT TWO SECONDS. Compared to all the other ranged damage nukes in the games, that is a miniscule cooldown! Pared with a relatively low willpower cost, this skill begs you to spam it. If you aren't firing off a Skewer at least once every 5 seconds, you aren't playing Zatanna right. Use this spell to poke your laning opponents and bring them down to below half health. Smart enemies will constantly move around to juke your Skewer and make you miss. That's alright, since the mana cost is so low, just keep up the pressure and you will hit them eventually. The constant pressure will suppress their aggression and open them up for a E+Q burst damage nuke. Max this skill first to bring your damage up to a respectable level.
Skewer really comes into its own when you gain your  Atlantean Royal Seal (4). The -20% movement speed debuff from the Skill Harrier slows down enemy champions good enough for you to be able to Skewer them again if they are running away. Use Dash, Dazzle on yourself or the enemy to further close the distance gap. With some decent farm in the form of power damage items to boost your damage output, those fleeing champions face a dilemma: either stand and fight, or keep running away in the hopes of reaching a tower or ally who can help him beat you off. Smart ones will stand and fight, often losing against your damage and crowd control, but the vast majority of enemies will continue to run like hapless lemmings, allowing you to wear them down at your leisure.
3.2 DASH, DAZZLE (W)

Allied Champion: The target gains 25% Move Speed for 4 seconds.
Enemy Champion: The target loses 25% Move Speed for 4 seconds.
Move Speed: 25% | 30% | 35% | 40%
Cooldown: 20 | 18 | 16 | 14
Dash, Dazzle Strategy: You don't necessarily need this skill in the laning phase of the game, as the mobility it provides is rather marginal compared to the utility that other skills provide. You can take one point at lvl 4 if you feel it can facilitate a gank, as the range of this skill is quite far and can prevent a low-health champion from getting home safe. Dash, Dazzle becomes more useful in the later stages of the match as you tend to move outside of your lane, pursuing fleeing enemies, escaping from ganks, and reaching power relays quickly in order to capture them. If you have self-cast activated in the options, you can double press W to quickly cast Dash, Dazzle on yourself. This will save you precious amounts of seconds that you can use to instantly escape. You should always use this skill offensively (cast it against enemy champions) when you are in a favorable battle, and on yourself or an escaping teammate if the battle is not going well. Get one point in the laning phase of the match, and put additional points in it after you max your Skewer (Q) and Punish, Protect (E). Max this ability over your ultimate Be A Rabbit (R) as it scales better and the lower cooldown is crucial.
Dash, Dazzle requires good timing and a good choice of targets in order to come to its fullest. However, when applied properly, this ability makes you virtually impossible to catch as you run away with stars under your feet, and it also makes enemies unable to flee from your deadly Skewers. Here's a general guide on how to use Dash, Dazzle:
-When you are chasing a fleeing enemy just out of range of your Skewer, use Dash, Dazzle on yourself to catch up to him
-When you are chasing a fleeing enemy who is in range of your Skewer, use Dash, Dazzle on the enemy so that you can catch up to him and land your Skewers more easily
-When you and an ally is chasing a fleeing enemy, but the ally is much closer to the enemy, use Dash, Dazzle on your ally to allow him to catch up to the enemy
-When you are getting attacked and need to flee, use Dash, Dazzle on yourself
-When an ally is getting attacked and needs to flee, use Dash, Dazzle on him
3.3 PROTECT, PUNISH (E)

Allied Target: Gain a Shield that blocks 50 damage. After 4 seconds the target is healed for 25% of the remaining shield, and nearby allies for half of that amount.
Enemy target: Reduces target's healing by 50%. After 4 seconds, they explode and deal 45 Power Damage to themselves and other enemies nearby. When detonated by Skewer, damage is doubled.
Protect Shield: 50 | 90 | 130 | 170 + 15% Bonus Will
Protect Heal: 25% | 40% | 55% | 70%
Punish Damage: 45 | 70 | 95 | 120 + 25% Power Damage
Cost: 75 | 85 | 95 | 105
Protect, Punish Strategy: This skill is a good complement in Zatanna's toolbox. The protection shield is rather meagre and scales very poorly throughout the game, but it can make or break an escape for yourself or an ally. With self-cast on in options, you can cast this quickly on yourself if you are receiving huge amounts of damage. However, in general, you should not waste the cooldown of this skill to prevent a few hits. Instead, you should wait for a good moment to cast it on an enemy, and then cast Skewer (Q) right after. The double damage bonus combined with the base damage from Skewer delivers a devastating amount of burst damage (especially in the early game) that can take off a third to a half worth of health from a typical low health champion. Use the E+Q combo in the later stages of the game against drones as well, as a single application is usually enough to clear out even upgraded waves. Max this ability after Skewer (Q) to maximize your damage potential.
3.4 BE A RABBIT (R)

Zatanna transforms her target into a rabbit for 2 seconds. As a rabbit, the target's Power Armor and Attack Armor are halved and cannot be changed until they transform back. The transformed enemy cannot attack or use Skills.
Duration: 2 | 2.25 | 2.5 | 2.75
Cooldown: 55 | 50 | 45 | 40
Cost: 100 | 110 | 120 | 130
Be A Rabbit Strategy: This skill is your hidden ace, and while quite a few Zatanna players think this is the weakest skill in her arsenal, it is actually a gem in disguise. Not only does this skill prevent an enemy from casting any ability, it also HALVES your target's attack and power armor. What this basically means is that for the short duration that it lasts, it can strip away most of the protection that power armor tanks have built up. Confident Shazam or Wonder Woman players who ordinarily laugh at your Skewers will suddenly find huge chunks of their heatlh evaporate when you damage them after casting this ability. Thus, when you use your ultimate, always strive to follow through with your E+Q combo for maximum damage. However, you can also use it defensively by casting it on an enemy while they are pouncing you (especially melee champions who have charged on top of you), but the duration is very short so make sure you Dash, Dazzle (W) yourself right after in order to escape successfully. You only need one level of your ultimate at lvl 6, since this ability scales quite poorly with more points. Getting extra points in Dash, Dazzle (W) is always worth over getting another point in your ultimate.
3.5 STAGE PRESENCE (PASSIVE)

Zatanna gains 0.5 Will Regen, and nearby allies gain 5 Power Armor.
Will Regen: 0.5 | 1 | 1.5 | 2
Power Armor: 5 | 10 | 15 | 20 + 0.5% Bonus Will
Stage Presence Strategy: This is what I think is her weakest ability. The power armor buff is not worth it, and the additional will regeneration is also not worth spending your crucial ability points. Instead of relying on this ability to boost your willpower regeneration and power armor, get items instead which can fullfill those functions much more effectively. Always level this ability up last.
4. Stolen Powers
Zatanna comes with 2 abilities that mimic the invulnerability and super speed stolen powers. Rather than take these redundant powers, I think Zatanna players should look for more unconventional utility. As a support champion, I think you can contribute the best with the following two powers, although Zatanna works well with plenty of other powers.
4.1 [[Batman's Trap]]
Batman's Trap is the most powerful stolen power in the game and complements Zatanna greatly. A single trapped enemy will be powerless against your Punish+Skewer (E+Q) combo, which you will be guaranteed to hit against an immobile opponent. Sure, other powers can give you a short burst of speed or a little extra health, but Batman's Trap can root enemies for 2.5 seconds. Think about that. Your ultimate Be A Rabbit (R) at level 1 lasts only 2 seconds. That means that Batman's Trap disables an opponent longer than your ultimate. It lasts longer than many other disabling abilities in the game, and is therefore an extremely powerful stolen power. Better yet, you start with 3 of them and can place up to two of the traps at a time. Combined with a medium recharge rate, that means that you will never run out of traps.
Now, you're probably thinking that people will never fall for the traps. But that couldn't be further from the truth. If you keep placing traps at the appropriate time and place, eventually your enemies will forget about them and inadvertendly walk on them. This happens often in the heat of the moment during an important teamfight or a desperate chase or escape. People fall for the traps all the time as long as you place them often enough.
4.1.1 Offensive use of Batman's Trap
While you can place the traps on a stealth pad in your lane and surprise your opponent, I find them to be much more effective if you place them in the middle of the lane in open sight. The mere presence of traps imposes a significant psychological pressure on your enemies. They have to be careful walking around the lane and be ever mindful not to take the easy route. You can place two traps next to each other to block off a significant cordon that the enemy champion have to walk around, or you can stagger the traps front and back in order to discourage chases. You can also try to bait your opponents by placing a trap just a bit behind you, go forward and attract enemy ganks. As you retreat back to your tower, your opponent in their enthusiasm to chase you may fall for the trap, leaving you free to unleash your Punish+Skewer (E+Q) combo.
In the later stages of the game, you should use the traps to cut off anticipated escape routes if there is an impending team battle. Since enemies often walk through stealth pads in order to shake off pursuit, it is a smart idea to place a trap there beforehand since it not only roots an enemy, it reveals them as well for a grand 10 seconds. During big team battles, you should strive to place a trap on the battlefield to confuse your opponents and add an additional disable for your allies to pounce upon. What I often do is place a trap in the middle of a fight between two melee champions. Since the enemy champion is normally so fixated in beating up your ally, they will find out far too late that they have allowed themselves to be trapped, leaving your ally free to disengage and others to nuke on the rooted champion.
4.1.2 Defensive use of Batman's Trap
Traps can be used defensively in order to secure routes of escape and discourage enemy champions from going after you. When your tower is being pushed, you can place a trap in front or to the side of the tower. This will discourage any enemy champions from using the tower's preoccupation with destroying drones from attacking the tower (making it last longer) or from tower diving in order to get at you. During the laning phase and later stages of the match, if you are doing something precarious such as pushing an enemy tower, you can place one trap right on top of you. This is an excellent deterrent against melee champions from charging you, and if they are somehow stupid enough to attack you, you can escape freely while they are rooted. In the end game phase of the match, you might be forced to defend your base against opponents who seek to destroy your power core. It's a good idea to place traps between your power core turret and your protected enclave when you heal up. Enemies stupid enough to chase you might find themselves trapped, exposing themselves to your team's devastating nukes.
However, the most often defensive use of Batman's Trap is to place them a bit in front of you as you are escaping an enemy gank. The traps take 2 seconds to prime, and a chasing opponent might or might not evade the priming time as they are chasing after you depending on their speed and distance to you. Still, not all enemies know that or are able to anticipate the priming time, leading them to cut off their chase. I have seen enemies cancel their chases plenty of times even when they were just one meters away from me because they were so afraid of being rooted by my traps! If you happen to have more distance between you and your opponent (which is often the case with the help of Dash, Dazzle (W), then it's even better as the trap will likely be primed by the time the enemy reaches you. They then have two choices: walk over the trap and be virtually guaranteed that you will escape completely, or walk around and giving you a further lead on them. In both cases, you will have successfully increase the odds that you have made it away safely.
4.2 [[Gaslight Batman's Surveillance Camera]]
As a support champion, it is expected that you carry Surveillance Cameras around. At least one member must carry them in each team in order to facilitate map vision, reveal invisible pads and counter invisible champions such as  Gaslight Catwoman and
  Nightmare Batman. In the laning phase, you should place them on the paths leading up to your lane in order to see a gank coming from your opponent's jungler. From the midgame onwards, you should place them near the Doomsday Device in the middle of the map to see whether the enemy is coming, or just ahead of the power relay before you capture it in order to see if you are being intercepted. Throughout the match, you should place at least one camera at a nearby stealth pad not only because you will be able to see if you are being flanked, you deny the use of the pad for any escaping enemies to juke you and your allies.
5. Item Build
Zatanna's recommended item build that the game suggests works well for her purpose. Overall, it provides three important benefits:
[list]
Willpower and willpower regeneration
Slow debuff
Power damage
[/list]
This is all it takes for Zatanna to become a supporting powerhouse. With willpower regenration, you can spam your Q endlessly. With the Skill Harrier from the  Atlantean Royal Seal (4), you direct the flow of battle, and with the power damage you can bring on the hurt. With the new Closed Beta 4 activatable items, sure you can get some additional benefits, but these are purely luxury choices that Zatanna should not depend upon. All she really needs to do well is her own active abilities.
5.1 Starting Items
 Nil Ring: Nil Ring is an excellent starter item with a nice combination of stats at its price. The health and willpower boost will make you less fragile and allow you to spam a few more Skewers (Q). I would not advise you to skip this item in favor of [[Doctor Destiny's Dreamstone (2)]] as the willpower regeneration boost is rather disappointing in the early game. Sell this item in the late game when you need an inventory slot to build a more expensive item.
[[Doctor Destiny's Dreamstone (1)]]: Get either this or some potions to spend your remaining money. The extra willpower regeneration will allow you to stay longer in the lane before you need to teleport back to base.
 Tektite Vial: If you think you are facing heavy harassment, forgo the [[Doctor Destiny's Dreamstone (1)]] and buy this item instead. With 3 charges before you need to refill at your base, you can significantly sustain your presence in the lane. It will remain useful during the midgame to top off your health and willpower and aid you in your escapes.
5.2 Early Game
[[Doctor Destiny's Dreamstone (2)]]: This item will boost your willpower regeneration considerably the longer you stay in your lane. Later in the game, the willpower regeneration becomes stronger and allows you to spam your spells without regard for cost. Sell this item in the late game after you sold your  Nil Ring for a luxury item since you will have enough willpower regenration by then to do without this item.
[[Abin Sur's Lantern (2)]]: The extra willlpower will come fast as you spam your spells, and will remain useful throughout the game. Take [[Abin Sur's Lantern (3)]] when you max the willpower gain or when it's convenient to receive a large boost in power damage.
5.3 Core Items
 Atlantean Royal Seal (4): This item is an excellent complement to Zatanna. Your Skewer has a base cooldown of 2.2 seconds. In chases, this allows you to prevent escaping enemies from running from your grasp by constantly applying Skill Harrier to your enemies. While the cost of this item is significant in the early and midgame, this item fits Zatanna the best due to her low cooldown nuke and is a must have. However, if you notice that your opponents are bad and that you don't need the Skill Harrier to get kills, feel free to get some damage items first before getting this one.
 The Starheart (4): After you get your
  Atlantean Royal Seal (4), you will notice that your damage tends to fall off, especially against tanks who build up health and power armor. Getting Starheart will give you a huge boost to damage, making you a huge threat to fragile champions and a respectable nuker against tanks. How early you manage to complete Starheart or other power damage items will dictate your performance in the mid and late game.
 The Book Of Eternity (2): In the lategame, all champions tend to have some form of additional power armor. Smart tanks will pile up their armor quite well and they can be a nightmare to fight against. Book of Eternity gives a respectable amount of power damage, but the power penetration will help you all the way, even against champions who do not stack their power armor.
5.4 Situational Items
[[Two Face's Coin (2)]]: If you notice you are doing really well and you are playing against opponents who are easy to kill, you can spend your extra cash on Two Face's Coin to snowball your damage in the later stages of the early game. Don't get this item if you aren't getting a lot of kills or if your team is losing.
 Cosmic Staff (4): If you are facing enemy tanks who have piled up a huge amount of health and power armor, this item will complement your
  The Book Of Eternity (2) by adding just a little bit more power penetration. Get the Book of Eternity first before you build this item, as the Disintegration debuff is not that significant most of the times unless you are playing against opponents with huge amounts of health.
 Oa Gambit (4): This is an affordable item that gives a decent boost to power damage and power armor. The latter provides a helpful amount of survivability against power damage nukers such as Green Lantern, Flash or Joker. More importantly, its active ability is extremely useful in shielding your allies and it scales to your level.
 Helm Of Fate (3): If you are facing a formidable attack damage based champion such as Cyborg, you should always build up a bit of Attack Armor. Helm of Fate neatly provides you with both Attack Armor and Power Damage, making it a remarkable efficient composite item for Zatanna who needs both.
[[Steel's Breastplate (4)]]: This is a good alternate choice in the mid and end game when you have loads of willpower and you're facing attack damage based champions such as Cyborg and Gaslight Catwoman. Take this as a more defensive choice to  Helm Of Fate (3).
[[Batman's Utility Belt (4)]]: If you are facing an enemy team full of debuffers (most notably an enemy Zatanna), getting this might be a good choice. The purge will clear you of any slows and other annoyances, which might be crucial to your survival.
5.5 Rejected Items
There are some items that fit relatively poorly with Zatanna's skillset unless you change your playstyle. Do note that the following list is just my personal opinion. Infinite Crisis is a game with a lot of freedom and you can build whatever items you want and try to make it work. Building Zatanna around the following items is still viable if you have an appropriate strategy, but they may or may not be as optimal as my own suggested item list. Here is a small list of items which I think you should probably not buy and why:
Basic Attack Modifiers ( Blue Scarab (3) and
  Psi-Scimitar (3) and
  Eye Of Ekron (4))
It is not worth it to buff your basic attack with items such as Psi-Scimitar because your Skewer (Q) only has a base cooldown of 2.2 seconds. When you are not Skewering an enemy, you are casting another ability, or positioning yourself for another Skewer (which is much more important than it sounds). A good Zatanna player will never find enough free time to release a basic attack. Don't get me wrong; Psi-Scimitar is an incredibly powerful item and it is certainly viable for Zatanna, but out of all the power damage based champions, Zatanna needs it the least. The only possible situation where you are forced to rely on your basic attacks is when you are out of willpower, but that is probably time for you to go back to base to recharge your willpower. Leave these kinds of items to Joker, Green Lantern or Flash, whose abilities have longer cooldowns and therefore have more downtime to deal basic attacks.
Coin Harvesting Items ( The Logoz (3) and
  Ruby Of Life (4))
While there might be situations where you need to destroy a lot of drones to push a tower or defend against a tower push, your primary function should never be to farm a lot of drones. An offensive Zatanna player is always out to kill enemy champions, help your allies kill enemy champions, or control the map by capturing power relays. You will rarely find enough free time on hand to farm coins leisurely.
Cooldown Reducing Items ( Eye Of Ekron (4) and [[Fatality's Energy Lance (4)]] and
  Marauder Ring (4) and [[Pandora's Box (4)]])
You don't need lower cooldowns. Your Skewer already has a base cooldown of 2.2 seconds and you should cast it whenever you can't cast your other abilities. Lowering cooldowns will only marginally make you able to cast your Skewers faster while shaving off a second or two off your Dash, Dazzle (W) and Punish, Protect (E). While the latter advantage can be quite useful in a big teamfight, more often than not your inventory space is better suited for items which stack more power damage or brings other benefits.
6. Coast City Strategy
6.1 Coast City Strategy: Early Game - Laning phase (0-10 minutes)
Whether you are laning top or bottom in Coast City, one of your main roles should be to harass the enemy champions with your Skewers (Q). Be persistent and try to wear down their health. Stay aggressive and never let up. You want to make their lives as miserable as possible, and a continuous stream of Skewers will make anyone's life a pure living hell. Take advantage of Skewer's long range and the fact that it doesn't matter if there are obstacles between you and your target.
6.1.1 Laning Top
It is more difficult to accomplish kills at the top lane. The short distance between the two towers means that enemy champions only have to make a few steps before they are behind the protective embrace of their tower. Conversely, laning top means that you are harder to kill because you have the same advantage. Smart defensive placement of traps mean that melee champions can't charge you without getting rooted and becoming vulnerable to the tower's attacks. It is therefore a good lane if you are outnumbered. If you happen to be laning solo against two or three enemy champions, you can survive quite a long time by placing traps next to the tower while clearing drone waves with your Punish+Skewer (E+Q) combo.
In the later stages of the laning phase, you will often see the enemy jungling champion come to your lane in order to gank. Smart ones will approach from the north, a direction where you have virtually no vision over unless you have the foresight to place a surveillance camera there. However, most junglers approach from the middle path to the south, which opens up after the power relays open. A single surveillance drone on the stealth pad at the bottom of the lane is enough to see most enemy gankers coming, giving you precious seconds to retreat to the safety of your tower.
While it is difficult to achieve kills top, it is not impossible to do so. In order to do so however you need to pull the equilibrium towards your side of the lane. What that means is that you need to allow your side's drones to get destroyed while avoiding dealing any damage to the enemy drones. This will push the fight near your tower, which is exactly what you want if you intend to kill enemies. The enemy champions are therefore forced to move away from their tower, giving you some much needed time and space to gank them. First lower their health by harassing them with a few Skewers (Q), then pounce on them with your Punish+Skewer (E+Q) combo to bring their health dangerously low. A single additional Skewer is usually enough to kill most squishy champions.
6.1.2 Laning Bottom
Bottom's odd V-Shape and the longer distance means it is easier to achieve kills here. Taking an early point in Dash, Dazzle (W) allows you to catch up to fleeing enemies or slow them down long enough to land a few extra Skewers (Q). Smart placement of traps is essential to facilitate your ganks. What I often do is place a trap at the tip of the V, which is on the route that is the shortest distance between the two towers. If your enemies just move past that trap and your lane is pushed by the enemies, you can try to gank them, triggering a flight reflex in which they seek to run to their tower as fast as possible. They often forget about the trap until its too late, rooting them in place long enough for you and your lane partner to kill them. This same trap placement can also be used when you are pushing the enemy tower. You can try to bait them into chasing you, and when the both of you are fleeing to your side of the tower, they might forget about the trap, rooting them in place for a devastating counter-strike.
Bottom is generally more vulnerable to ganks from junglers, as they come from the top and bottom of the lane in slightly more equal amounts. You can see the ganks from the north easily enough with a surveillance camera in the middle of the stealth pad there. South is a more difficult question though as junglers can come from the left or right stealth pad, and you don't have enough surveillance cameras to cover both and also cover north. Ideally, you should be laning with a partner who is also carrying surveillance cameras in order to be completely sure that you aren't being ganked, or barring that, have Gaslight Catwoman's X-Ray Vision in order to keep track of the jungler's position.
6.2 Coast City Strategy: Mid Game - Ganking and Tower Pushing phase (10-25 minutes)
The mid game phase of the match is often characterized by either ganking or trying to achieve a state of dominant map control.
When one side has map control, their champions can move around the map with relative inpunity, while the other side has to stay constantly on the defensive, never straying far from their base. Towers represent map control because their damage output is significant up until the late game and can deter further pursuit by chasing champions. Map control is further gained by controlling power relays, which boost your side's drones and prevents the enemies from strengthening their own drones. Controlling two or more power relays means that one or both lanes will be constantly pushed by your uber-drones, growing capable enough to destroy towers if they are not opposed by a defending champion. Destroying enemy towers, defending your own towers, and gaining control of at least two power relays becomes the over-arching objective in the mid game.
When a side has lost map control (especially in the case of losing all three power relays to the enemy), they can quickly become trapped in a vicious cycle where they can't gain map control because they can't capture the power relays, which they can't capture because they don't have map control. The Doomsday Device in the middle of the map, though extraordinarily risky to obtain, can further enhance map control by damaging towers and insta-killing defending champions.
In this struggle to gain map control, champions tend to move out of the lane, fighting near the power relays or near a tower that is being pushed. The side which gains the most kills will usually be able to snowball to victory in the late game, so it is crucial that your side is ahead.
Zatanna is a champion who has an unmatched combination of abilities that can help her team gain map control or prevent the enemy from taking it. Her Dash, Dazzle (W) allows her to race across the map, capturing distant power relays (especially the top one) long before an enemy can reach it. You can also instantly clear drone waves with your Punish+Skewer (E+Q) combo, helping you defend or attack towers. Ideally, you should focus on capturing power relays even before they open up (the timeline at the top of the screen tells you when they become available to capture), while leaving the drones to another ally to clear in order to farm more money.
During the midgame, you should focus on performing different roles depending on how good your farm is relative to your allies and enemies:
[list]
If your farm is very good, and you have a good money advantage over the enemy, then you should act as a full carry, trying to kill as many enemy champions as possible with your high power damage
If your farm is decent and average, then you should play a semi-carry role, working as a team to achieve kills together with your allies and capturing power relays whenever they become available
If your farm is bad and you notice you contribute little damage in teamfights, then you should perform a full support role, being the first person to capture distant but critical power relays, defend against lane pushes by clearing drone waves, and performing crowd control functions in teamfights
[/list]
6.3 Coast City Strategy: Late Game - Teamfight phase (30+ minutes)
The late game phase of the match is marked by an absense of towers and the presence of farmed champions who can easily kill two or more opponents before they can blink. Ideally, you would be one of those farmed champions, but even if you don't have a lot of power damage items you can still contribute in important team fights. These fights (often 5v5) are critically important because the high levels of each character means that they need to wait more than a minute to respawn. If an entire team happens to get annihilated, this can give the enemy team the opportunity to push the power core and destroy it, winning the match.
Due to the risks involved in getting annihilated, both sides are usually reluctant to risk themselves unless one side has a clear advantage over the other. Team fights therefore often happens in situations where the other team will not or cannot flee: when trying to capture the Doomsday Device, when pushing the last tower or the power core, or when capturing the power relays. Team fights can also happen when the enemy ambushes part of the other team, and their allies come to defend them. In all those cases, a single death will not change the outcome of the match too much, but if three or more champions from the same side gets killed, that is usually enough of an opening to destroy the power core.
Your role as Zatanna is to not get killed during these fights. The longer you stay alive, the more you can buff and debuff your allies and enemies. If you happen to be farmed enough to be considered your team's primary or secondary carry, your role is even more essential as your damage output is necessary to kill the other team. As Zatanna, you rely on your mobility for protection. Let your other teammates attract the enemy's attention and soak up the damage while you run around and Skewer (Q) as much enemies as possible.
7. Friends and Foes
7.1 Friends
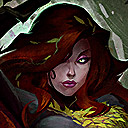 Poison Ivy
Some people scoff at running double support, and they are especially sceptical if they are on the same lane. But Zatanna and Poison Ivy are two girls who are practically made together. Both of you possess shielding abilities in the form of Punish, Protect (E) and Thorn Shield (E) which both add some much-needed tankyness. Furthermore, the harass from your Skewer (Q) and Poison Ivy's Blow Kiss (W) can quickly wear down the health of your laning opponents, opening them up to your combined burst damage strike. If Poison Ivy manages to land her Root Strike (Q) right at an enemy, they will be knocked down for 1.25 seconds, plenty of time for you to land your Punish+Skewer (E+Q) combo and Ivy to Blow Kiss (W) for additional damage. This usually destroys all but the tankiest of laning opponents.
 Wonder Woman
Wonder Woman is a tank that can neatly attract the attention of enemy nukers, lowering the heat on you and allowing you to harass your lane opponents more effectively. Her Protection (W) combined with your Protect, Punish (E) allows the both of you to survive sudden ganks or huge amounts of burst damage. Furthermore, her Lasso (Q) and Blocking Bracers (R) holds down enemies long enough for you to land your Punish+Skewer (E+Q) combo.
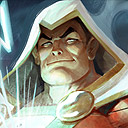 Shazam
Shazam is another tank that is an excellent companion to an offensive Zatanna. He can quickly become decently tanky in the early stage of the game, occupying your enemy lane opponent's attention with his annoying Mystic Power (W). He really starts to shine when he pounces on enemy champions with Speed of Mercury (Q), knocking them down for a short but sweet 0.7 seconds. Most of the time that is usually enough for you to land your Punish+Skewer (E+Q) combo, oblitherating champions who were hovering around with half health. His Lightning Field (E) slows down fleeing enemies just enough for you to Skewer the enemies even more.
7.2 Foes
 Green Lantern
A good Green Lantern player is your worst nightmare if he harasses you aggressively. His Slam (Q) has a range that matches your Skewer (Q), but never misses. Worse, his Constrict (W) slows you for a crucial amount of time, allowing him to Slam (Q) you easily and punishing you whenever you come close to harass him with your Skewer (Q). Laning against a Green Lantern therefore becomes a contest between who can out-harass the other. While you need to aim your Punish+Skewer (E+Q) combo, the Green Lantern has no such difficulty landing his Constrict+Slam (W+Q) combo, leading you to lose the engagement more often than not if both of you are equally skilled.
Any Tank ( Wonder Woman,
  Gaslight Joker,
  Shazam)
Tanks who build lots of health or power armor early can be a pain in your rear in the second half of your laning stage. They eat your Skewers (Q) like breakfast and can keep on taking them. If they keep on stacking power armor, you are virtually powerless against them until you build some power penetration items to mitigate it. Ideally, you should ignore the tank and focus on the squishier enemies. If you are forced to fight a tank, then reserve your Be A Rabbit (R) against them as it halves their power armor.


 Zatanna on Coast City and not be a complete background fixture. I reject the notion that Zatanna should be played as pure support and not gain any kills for her own. Among her many roles, she is primarily a nuker and with the right strategy and farm (the amassing of large amounts of money in a short time period), she can three-shot squishy champions very easily. Even without a farm advantage, Zatanna can still debilitate her opponents while wearing them down with persistent attacks.
Atlantean Royal Seal (4). The -20% movement speed debuff from the Skill Harrier slows down enemy champions good enough for you to be able to Skewer them again if they are running away. Use Dash, Dazzle on yourself or the enemy to further close the distance gap. With some decent farm in the form of power damage items to boost your damage output, those fleeing champions face a dilemma: either stand and fight, or keep running away in the hopes of reaching a tower or ally who can help him beat you off. Smart ones will stand and fight, often losing against your damage and crowd control, but the vast majority of enemies will continue to run like hapless lemmings, allowing you to wear them down at your leisure.
 Gaslight Catwoman and
  Nightmare Batman. In the laning phase, you should place them on the paths leading up to your lane in order to see a gank coming from your opponent's jungler. From the midgame onwards, you should place them near the Doomsday Device in the middle of the map to see whether the enemy is coming, or just ahead of the power relay before you capture it in order to see if you are being intercepted. Throughout the match, you should place at least one camera at a nearby stealth pad not only because you will be able to see if you are being flanked, you deny the use of the pad for any escaping enemies to juke you and your allies.
 Poison Ivy
 Wonder Woman
 Shazam
 Green Lantern
 Wonder Woman,
  Gaslight Joker,
  Shazam)